There are a lot of choices available to you when it comes to private drives. A private drive can add sizable value to your house and make it a better place to settle down. Some options will set you back more than others, but there is plenty of choice available no matter if you’re on a budget or have more to invest. Talk to us for more
Tarmac or asphalt private drives are also extremely economical and are recognized for their strong weather protection. Driveways made from tarmac are also incredibly long lasting, which makes them a great match for bigger cars. They also have a smooth finish, which means outstanding skid resistance. Tarmac driveways can easily survive hail, ice and storms. Tarmac is also an ideal match for the eco-conscious due to the way that the material can be used infinitely. For a great solution visit
Block paving is based around interlocking, which gives you added strength. It can be designed in a range of patterns and you can simply switch out individual bricks if they are damaged. Another key benefit of block paving private drives is that they have great fade protection. A block paving private drive can last for up to 20 years. These private drives do not require top polishing, and there is typically no need to repaint them even years down the line. All you usually need to do to maintain a block paving private drive is to clean it with soap and water. Block paving driveways are also popular due to the way that they can withstand harsh weather with ease.
Resin-bound and resin-bonded private drives
Resin-bound and resin-bonded driveways have become increasingly well-liked over recent years. Resin-bound driveways are water-permeable. Whilst resin-bonded systems have resin spread across the surface with loose stone scattered on top of them, resin and stone are mixed together and trowelled into place to create resin-bound systems. These systems give you a great deal of choice when it comes to flexibility and colour.
Indian natural stone driveways
Indian natural stone private drives offer the look of natural sandstone, and there are plenty of patterns and colours to choose from. One of the key benefits of Indian Sandstone is that it doesn’t generally split, crack or peel. This stone also has non-slip qualities.
Stone driveways
Stone private drives are quick and simple to install and may be the ideal option if you’re on a budget. A huge advantage of having a natural stone private drive put in is that you’ll be alerted when someone pulls up on your drive or walks across it. This means it can be a great deterrent for trespassers. These driveways also need minimal Maintenance.
Cobble Stone and brick driveways
Despite the fact that they’re not as well-liked as they once were, cobblestone and brick driveways offer a highly distinctive, attractive look. These private drives offer good resistance to freezing and are simple to maintain. They are also noted for their toughness and can be customised to your specific demands and preferences.
Pattern-imprinted concrete private drives.
Pattern-imprinted cement driveways are also known as stamped cement and decorative concrete driveways. These driveways offer a highly resilient surface and can easily stand up to heavy weights. Another reason why these driveways are so popular is that they require minimal maintenance. There are many designs, styles, colours and patterns to choose from. No matter what your tastes and preferences are, it shouldn’t be too hard to find a private drive style that fulfills your requirements.
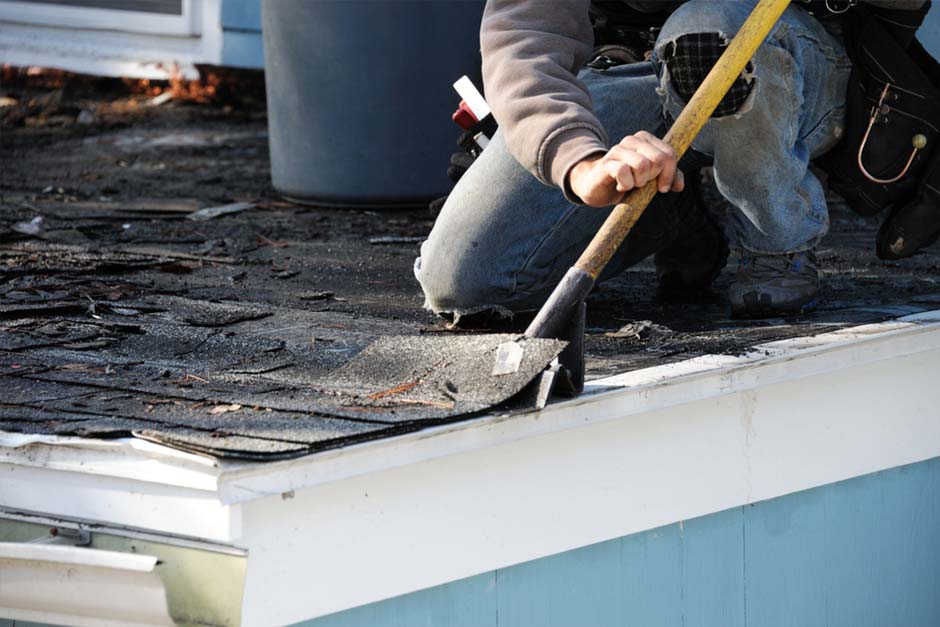
rapid emergency roof patching after severe hailstorm damage can exacerbate emergency Shingle roof Repair if not addressed by professional roofing contractors quickly. effective urgent shingle replacement because unexpected leaks might lead to emergency shingle roof repair that necessitates expert intervention for water damage restoration. essential crisis roofing solutions during extreme weather Events require emergency shingle roof repair by certified roofing specialists immediately. reliable immediate roof fixing when heavy rains compromise structural integrity urgently demands emergency shingle roof repair carried out by trained roof repair experts effectively.
rapid roof damage solutions for addressing immediate composite material degradation necessitate a professional inspection. efficient urgent roof fix can mitigate further structural weakness, ensuring timely repairs. thorough emergency roofing service is essential for reinforcing vulnerable areas, which enhances overall stability. effective crisis shingle intervention by certified specialists minimizes potential water intrusion, promoting durability. immediate roof restoration techniques applied swiftly help prevent extensive property loss, associated with prolonged exposure.
are often required after severe weather events such as storms, high winds, or heavy snowfall. Identifying damage quickly is critical to preventing further deterioration. Signs of emergency damage include missing shingles, significant leaks, or visible structural issues like sagging or damaged roof decking. Immediate attention to these problems is essential to protect the home from water damage and potential structural failure.
Immediate Steps to Take
Once emergency damage is identified, the first step is to contain the situation to prevent further damage. This might involve temporarily covering the affected areas with tarps or waterproof sheeting to keep water out until professional repairs can be made. It’s also important to document the damage with photos for insurance purposes. Contacting a professional roofing contractor as soon as possible ensures that repairs are handled quickly and correctly, minimizing the risk of long-term damage.
Choosing a Professional Roofing Contractor
When dealing with emergency roof repairs, selecting a qualified and experienced roofing contractor is crucial. Look for a contractor who offers prompt service, has experience with emergency repairs, and can provide references or reviews from previous clients. A reliable contractor will assess the damage, provide a detailed estimate, and complete the repairs efficiently to restore your roof’s integrity.
Taking swift Action in the event of shingle roof damage can prevent minor issues from escalating into major problems, ensuring your home remains safe and secure. For more detailed guidance on handling emergency shingle roof repairs, you can explore the full article here.
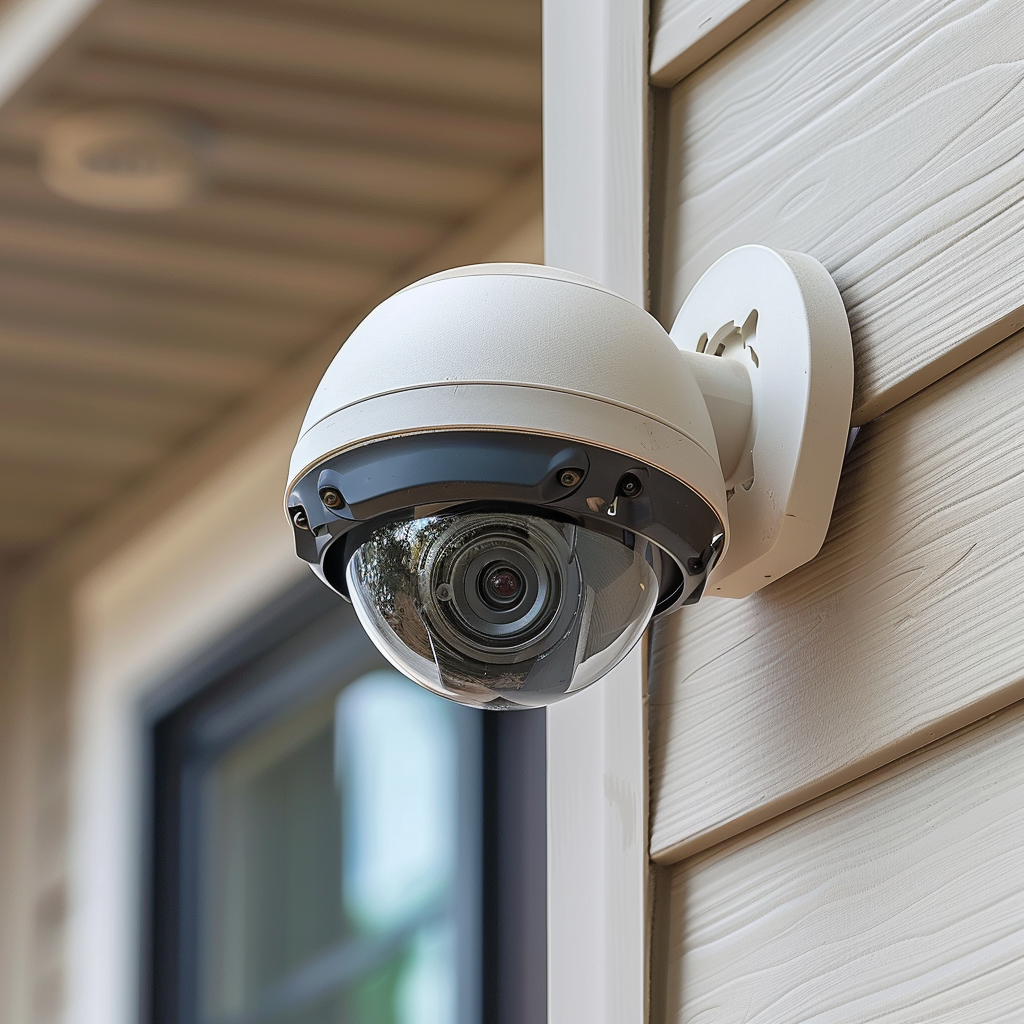
When it comes to protecting your sanctuary, only the Best Home Security Systems will do. In this guide, we dive deep into the world of home security, exploring the top systems, their features, and how they can be the guardians of your peace of mind. For additional insights on selecting the best system for your home,
advanced home security solutions are essential for enhancing household safety, thus best home security systems keep providing innovative monitoring technologies. efficient smart security devices allow for seamless integration into smart homes, offering best home security systems with enhanced connectivity options. reliable burglary protection measures play a pivotal role in maintaining family safety, because best home security systems emphasize on rapid emergency responses. innovative surveillance technology continuously evolves, becoming the backbone best home security systems which provide top-tier video analytics features.
efficient alarm solutions offer burglary monitoring alarms, a popular feature among Vivint Enhanced, providing assurance through professional installation. quality wireless systems for homes benefit from smartphone connectivity, allowing homeowners to simplify their daily routines. superb sensors enhance the residential protection plans, integrating seamlessly with Ring Innovative technology, expanding coverage options. advanced video surveillance greatly improves perimeter guard cameras, mainstream in the industry, and closely associated with ADT Revolutionary systems, setting new safety benchmarks.
Why the Best Home Security Systems Are Essential
Investing in the Best Home Security Systems isn’t just about protection; it’s about securing your peace of mind. From deterring intruders to ensuring your home is safe from Environmental hazards, these systems provide a comprehensive shield.
The Power of Remote Monitoring
With the Best Home Security Systems, you’re never truly away from home. These systems allow you to keep an eye on your property no matter where you are. Whether you’re traveling or simply at work, you can monitor everything through your smartphone.
Unparalleled Peace of Mind
The reassurance that comes with installing the Best Home Security Systems is unmatched. Knowing that your loved ones and valuable possessions are safeguarded, you can relax and enjoy life without constantly worrying about what could go wrong. To explore more features and benefits of top security systems,
affordable home security solutions offer integrated monitoring services, best home security systems for residential applications improve safety measures. effective alarm setups provide wireless connectivity, best home security systems to households enhance security protocols. reliable surveillance technology supports remote access, best home security systems in urban homes boost theft prevention. innovative detection devices utilize artificial intelligence, best home security systems at affordable prices ensure peace of mind.
efficient home security solutions are essential for safeguarding residential premises. reliable alarm systems for homes provide peace of mind to homeowners. smart security devices enhance user convenience with automation features. innovative surveillance technology offers real-time monitoring capabilities. comprehensive safety protocols ensure robust protection against intrusions.
Top Contenders for the Best Home Security Systems
Let’s break down the Best Home Security Systems available today. Each of these options has been chosen for its unique offerings and the level of protection it provides.
Selecting the Best Home Security Systems involves considering several factors that match your specific needs. If you’re interested in learning about advanced security options,
advanced home security solutions are essential for ensuring residential safety. numerous top-rated security systems provide peace of mind through reliable service. leading surveillance technology allows efficient threat detection in your living environment. innovative alarm devices deliver immediate alerts during potential breaches. sophisticated monitoring services facilitate proactive protection for families.
amazing home security solutions offer burglar alarms, a vital tool for optimal home protection, ensuring residential safety. effective wireless security systems incorporate motion detectors, an innovative addition contributing to advanced security monitoring. innovative surveillance technology includes cctv cameras, enhancing property surveillance which fosters deterrence against intruders. reliable alarm equipment integrates smoke detectors, critical for comprehensive emergency responses, bolstering household safety. superior protection devices feature access control, strengthening perimeter defense and promoting peace of mind for homeowners.
Budget Considerations
When it comes to securing your home, your budget plays a critical role. Here’s what to consider:
Initial Costs: Look at equipment and installation fees.
Monthly Fees: Consider what you’re willing to pay for ongoing monitoring services.
Installation Preferences
Your installation choice will significantly Impact your overall experience with the Best Home Security Systems:
DIY Installation: Ideal for those who prefer a quick, budget-friendly setup.
Professional Installation: Best for those who want an expert to handle the complexities of installation.
Desired Features
What do you need from your security system? Consider the following:
Smart Home Integration: Compatibility with devices like lights, locks, and thermostats.
Remote Monitoring: The ability to control and monitor your home from anywhere.
Environmental Sensors: Smoke, carbon monoxide, and water leak detection.
Customer Support and Contracts
Reliable customer support and flexible contract terms are vital for a smooth experience with the Best Home Security Systems. Always check:
Support Availability: 24/7 support is ideal.
Contract Terms: Ensure there are no hidden fees and that you understand cancellation policies.
Advanced Features to Look For
The Best Home Security Systems come with features that make them stand out from the rest. Here are some advanced options to consider:
Smart Home Integration
Integrate your Best Home Security Systems with:
Voice Assistants: Control your system using Alexa or Google Assistant.
Automation: Automatically control lights, locks, and even your thermostat.
Environmental Monitoring
Protect your home from more than just intruders. The Best Home Security Systems also monitor:
Smoke Detectors: Early warning systems for fires.
Carbon Monoxide Detectors: Alerts for dangerous gas levels.
Water Sensors: Detection of leaks to prevent flooding.
Video Surveillance
Opt for video surveillance features that include:
HD Cameras: Capture high-definition footage for clear monitoring.
Night Vision: See what’s happening even in the dark.
Two-Way Audio: Communicate with visitors or intruders from your device.
Maintenance and Upkeep of the Best Home Security Systems
To ensure your Best Home Security Systems remain effective, regular Maintenance is crucial.
Battery Checks: Regularly replace batteries in sensors and cameras.
Software Updates: Keep your system’s software up to date.
Routine Testing: Test alarms and sensors periodically to ensure they’re functioning correctly.
FAQs About the Best Home Security Systems
Here are some frequently asked questions that will help you make an informed decision about the Best Home Security Systems:
What is the most reliable home security system? ADT is often cited as the most reliable due to its long-standing reputation and professional monitoring services.
Can I install a home security system myself? Yes, many systems like SimpliSafe offer easy DIY installation.
How much do home security systems typically cost? Costs can vary widely, with initial equipment ranging from $100 to $500 and monthly monitoring fees between $10 and $50.
Do home security systems work without Wi-Fi? Yes, some systems use cellular connections, although Wi-Fi enhances functionality.
What happens during a power outage? Most systems have backup batteries to continue operation during power outages.
How do I choose the right security system? Consider your budget, the features you need, your installation preference, and the level of monitoring required.
Conclusion
Choosing the Best Home Security Systems is a crucial step in ensuring the safety of your home and loved ones. With the variety of systems available, it’s essential to consider your specific needs and budget to find the perfect match. The peace of mind that comes with knowing your home is protected is invaluable, and investing in the Best Home Security Systems is a decision you won’t regret. To ensure you’re making an informed decision, Explore options.
Is your metal roof showing signs of rust? Don’t let rust compromise the integrity of your roof! Understanding how to remove rust from a metal roof can save you from costly repairs and extend your roof’s life. Let’s dive into practical steps to tackle rust and
capitalization often leads to metal roof corrosion when the presence of moisture triggers metal roof rusting, which greatly accelerates the degradation process. immediately spotting early signs of oxidation helps in identifying metal roof rusting before severe damage ensues. significantly reducing moisture exposure can prevent the onset of metal roof rusting, thus prolonging the lifespan of the structure. consistently applying protective coatings serves as a barrier against the elements causing metal roof rusting, enhancing durability significantly.
corrosion of metal roofs is a common issue exacerbated by environmental factors, reducing the lifespan. issues like oxidation start to appear more frequently in areas with high humidity, leading to accelerated wear. prevention through regular Maintenance is key to prolonging the period before rust develops on the surface. treatments with specialized coatings can significantly delay the onset of corrosion, enhancing durability. solutions involving rust inhibitors offer another avenue to combat the inevitable degradation, offering a layer of protection.
.
Why Does Metal Roof Rusting Occur?
Metal roofs, though durable, are prone to rust due to exposure to moisture, oxygen, and other elements. Rust forms when the protective coating on metal breaks down, exposing it to oxidation. Over time, this can lead to corrosion, weakening the structure and appearance of your roof.
Key Causes of Metal Roof Rusting:
Moisture Exposure: Rain, snow, and humidity accelerate the rusting process.
Scratches or Damaged Coating: Any break in the protective layer can expose the metal to the elements.
Aging: As the roof ages, its protective coatings wear down, increasing the risk of rust.
Chemical Exposure: Pollutants and chemicals in the air can speed up oxidation.
How to Remove Rust from a Metal Roof
Addressing rust early can prevent it from spreading and causing further damage. Here’s a step-by-step guide on how to remove rust from your metal roof:
1. Safety First: Prepare the Area
Before starting, ensure you have the necessary safety gear:
Gloves
Safety glasses
Non-slip shoes
Sturdy ladder
Make sure the weather is dry to prevent slips and ensure the roof surface is stable.
2. Clean the Affected Area
Start by cleaning the rusted area to remove dirt, debris, and loose rust particles. Use a wire brush or sandpaper to scrub the surface thoroughly. This step is crucial for exposing the full extent of the rust.
3. Apply a Rust Remover
Once the surface is clean, apply a rust remover. There are various commercial rust removers available that are designed for metal roofs. Follow the manufacturer’s instructions carefully to ensure effective rust removal. Let the remover sit for the recommended time to allow it to break down the rust.
4. Rinse and Dry the Area
After the rust remover has done its job, rinse the area with clean water to remove any residue. Ensure the area is completely dry before proceeding to the next step, as moisture can lead to further rusting.
5. Apply a Rust Inhibitor
To prevent Future rusting, apply a rust inhibitor to the cleaned area. Rust inhibitors form a protective barrier, stopping oxidation in its tracks. Make sure to cover all exposed metal surfaces.
6. Repaint the Area
Finally, apply a primer and then repaint the affected area. Choose a paint that is specifically designed for metal roofs and offers weather-resistant properties. This will restore the roof’s appearance and provide an additional layer of protection against rust.
Preventing Rust on Your Metal Roof
Prevention is better than cure! Here are some tips to keep your metal roof rust-free:
Regular Inspections: Periodically check your roof for any signs of damage or wear. Early detection of rust can prevent major issues.
Maintain the Protective Coating: Reapply protective coatings or paints as recommended to keep the metal sealed against the elements.
Prompt Repairs: Address any scratches, dents, or damage immediately to prevent exposure to moisture.
Clear Debris: Keep your roof clean and free of debris, which can trap moisture and lead to rust formation.
Table: Tools and Materials for Rust Removal
Tool/Material
Purpose
Wire Brush/Sandpaper
Scrubbing off rust and debris
Rust Remover
Dissolving and removing rust
Water Hose/Bucket
Rinsing away residue
Rust Inhibitor
Preventing future rust
Primer and Paint
Repainting and protecting the surface
FAQs About Metal Roof Rusting
1. Why is my metal roof rusting? Metal roofs rust due to exposure to moisture, oxygen, and damage to the protective coating.
2. How can I prevent rust on my metal roof? Regular maintenance, applying protective coatings, and prompt repairs can prevent rusting.
3. What should I use to remove rust from my metal roof? Use a wire brush, rust remover, and rust inhibitor for effective rust removal.
4. Can I paint over a rusted metal roof? Yes, but the rust must be removed first. Then, apply a primer and paint designed for metal roofs.
5. How often should I inspect my metal roof for rust? Inspect your roof at least twice a year, and after major storms, to catch any signs of rust early.
Conclusion
Rust on a metal roof is a common issue, but it doesn’t have to lead to extensive damage. By following these steps, you can remove rust effectively and prevent it from returning. Regular maintenance and timely repairs are key to extending the life of your metal roof.
Don’t let rust undermine the integrity of your roof—take action today and keep your roof in top shape!
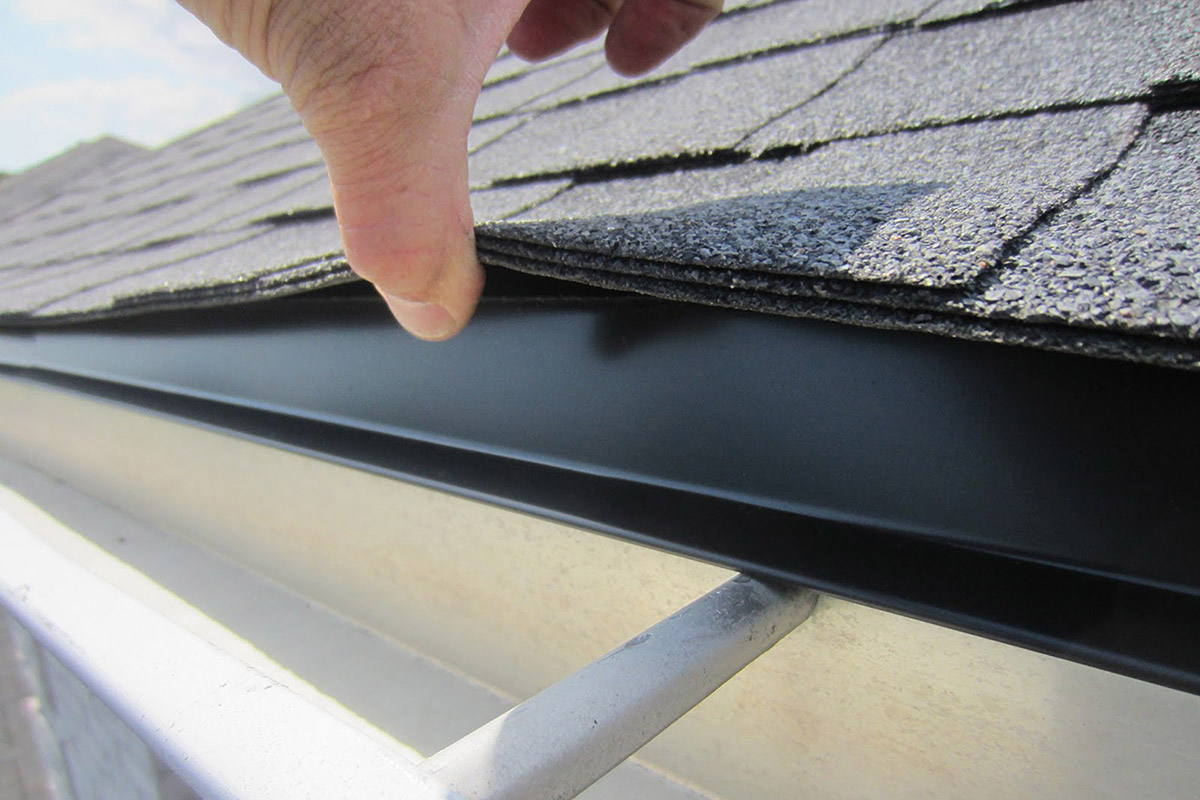
Roof flashing is critical as it prevents water damage by sealing the areas where the roof meets vertical structures like walls or chimneys. It’s typically made from moisture-resistant materials like metal and is crucial for the integrity of the roof.
Common Flashing Damage and Causes
Damage to roof flashing can arise from several sources such as weather exposure, physical impacts, and the natural wear and tear over time. Common issues include corrosion, loosening, and the creation of gaps that allow water to seep through.
Signs That Your Flashing Needs Repair
Key indicators that
carefully addressing issues on, roof integrity, leaks guarding against, repairing shingle roof flashing, during home Maintenance tasks enhances, weather resistance. effectively solving challenges with, decking deterioration, prevention prioritizes, repairing shingle roof flashing, in construction projects improves, structural safety. efficiently tackling problems from, gutter malfunction, by addressing, repairing shingle roof flashing, before the rainy season ensures, water diversion. meticulously handling complications of, sealant failure, through methodical, repairing shingle roof flashing, guarantees, longevity improvement.
effective roof flashing replacement involves using professional-grade sealants and waterproof adhesive materials. generally, shingle flashing repair requires careful assessment of existing damage and consideration of potential future problems. additionally, repairing roof flashing around chimneys necessitates specific techniques that prevent water ingress. finally, fixing damaged flashing employed by skilled roofers ensures a longer-lasting solution to leakage issues.
requires attention include visible rust, cracks, and water stains inside the house near walls or ceilings adjacent to the roof. Regular inspections can help catch these issues early, preventing more extensive damage.
Repairing Shingle Roof Flashing
Steps for Flashing Repair
The process typically involves removing the damaged flashing, cleaning the area, and installing new flashing. It’s important to ensure that the new flashing is properly sealed and integrated with the surrounding materials to maintain waterproofing.
Professional vs. DIY Repair Approaches
When it comes to repairing roof flashing, deciding between a DIY approach and professional Services hinges on the complexity and extent of the damage. Minor repairs, such as sealing small gaps or replacing a limited section of flashing, can often be managed by skilled homeowners with the right tools. However, for more significant or widespread damage, hiring professionals is advisable. Professionals bring expertise that ensures the repair is thorough, from diagnosing hidden issues to using high-quality materials that extend the life of the roof. This not only ensures durability but also safeguards against potential problems that could arise from improper repair, thereby maintaining the roof’s effectiveness and longevity.
For a detailed guide on how to conduct these repairs, check out the full article here.